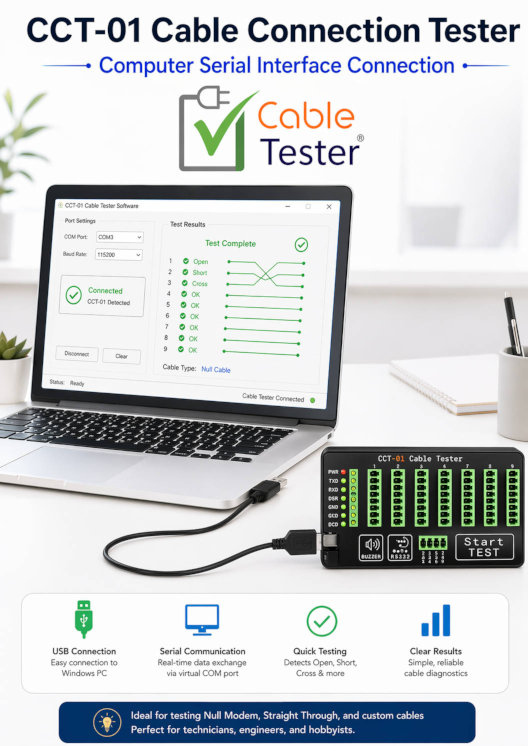
This page explains, in a simple way, how a computer can talk to the Cable Tester CCT-01 using its USB-C serial connection. It shows how the tester appears as a COM port, what serial settings to use, and how simple commands can be sent to make the tester perform actions such as checking a cable or learning a cable. The page also explains that the tester sends back text-based results, making it easier for users to understand and allowing developers to create their own software around it.
Video Sections
- Open a serial terminal software.
In this demonstration, we are using a web-base serial com software. You can also use your own serial terminal software.
You can refer to this page for the detailed setting up of the ASLWebTerm serial com software,
or click here for more other serial COM software options. - Set up the serial communication settings
- Serial Com Port Settings:
Baud Rate: 115200bps
Data Bits: 8 bits
Stop Bits: 1 bit
Parity: None
Hardware Flow Control: None
- Serial Com Port Settings:
- Connect CCT-01 via USB-C port.
This connection will supply power to the cable tester, as well as open up a virtual serial COM port on your computer system.
Your software can then connect to this virtual serial COM port to start communicate with the tester device. - Click connect to the correct serial COM port.
Select the correct COM port. If you are unsure which port, you can unplug and plug right back to observe the changes in the COM port listed. This will help you pin point which COM port belongs to the CCT-01 tester. - Press on the Esc key on your keyboard. This is equivalent to sending the byte 0x1B from your software to the CCT-01 tester. The tester receiving this data byte 0x1B is going to response you back with a menu through the serial COM port. A short section of the menu is as follows,
********************************************************
—– Command ———-
<1> – Test & Compare Cable Connection
<2> – Get Current Cable Connection
<3> – Display Learned Cable Connection
<4> – Learn Cable Connection
<5> – Monitoring for Broken Connection (slow scan)
<6> – Guided cable-tester diagnostic test
<7> – Reset to factory default settings
********************************************************
The more frequent use command that your custom GUI software will use is, command ‘2’ (which is sending data byte 0x32).
This command read the current connection that is on the cable-tester.
Command ‘1’ (0x31) is similar to pressing the TEST button on the cable tester.
Command ‘4’ (0x34) is similar to pressing the LEARN button on the cable tester. - There are more options command but may not be useful for your custom software. You can press ‘1’ to ‘7’, or ‘S’ or ‘A’.
- From your custom software, you just need to send a single byte command to the cable tester device.
- The cable tester will response you back with a chunk of text which are the result. You can then decode the text response and present the result on your custom software.
This CCT-01 Cable Connection Tester software interface is design for human readability. As such, the decoding can be tedious.
If you need a more simplified software interface, can contact us for a custom software API interface solution which fits your cable testing workflow.